
Animating Your First Impression: A Guide to Creating a Stunning Splash Screen in React Native


Are you tired of staring at a boring white screen while your React Native app loads? Well, fear not! In this article, we'll be diving into how to create a splash screen with a cool animation that'll make your app stand out from the crowd.
First things first, let's define what a splash screen is.
A splash screen is a visual element that appears when an app is first opened, usually displaying the app logo or name. It's a great way to give your users a visual cue that the app is loading and to provide a sense of brand identity.
Now, onto the fun stuff - the animation. There are plenty of ways to make your splash screen animation unique and eye-catching, from simple fade-ins to complex animations that incorporate the app logo. One popular option is to use Lottie, a library that allows you to add animations to your React Native app. With Lottie, you can create a seamless transition from the splash screen to the main app screen.
But before we dive into the code, let's take a moment to appreciate some splash screen memes.

(When you realize that splash screen was waiting for you to click and skip it 😂🤣..")

Now that we've had a good laugh, let's get back to business. Let's use expo go quickstart
npx create-expo-app SplashScreen

cd SplashScreen
npx expo start
This will give you a QR code in the console like this
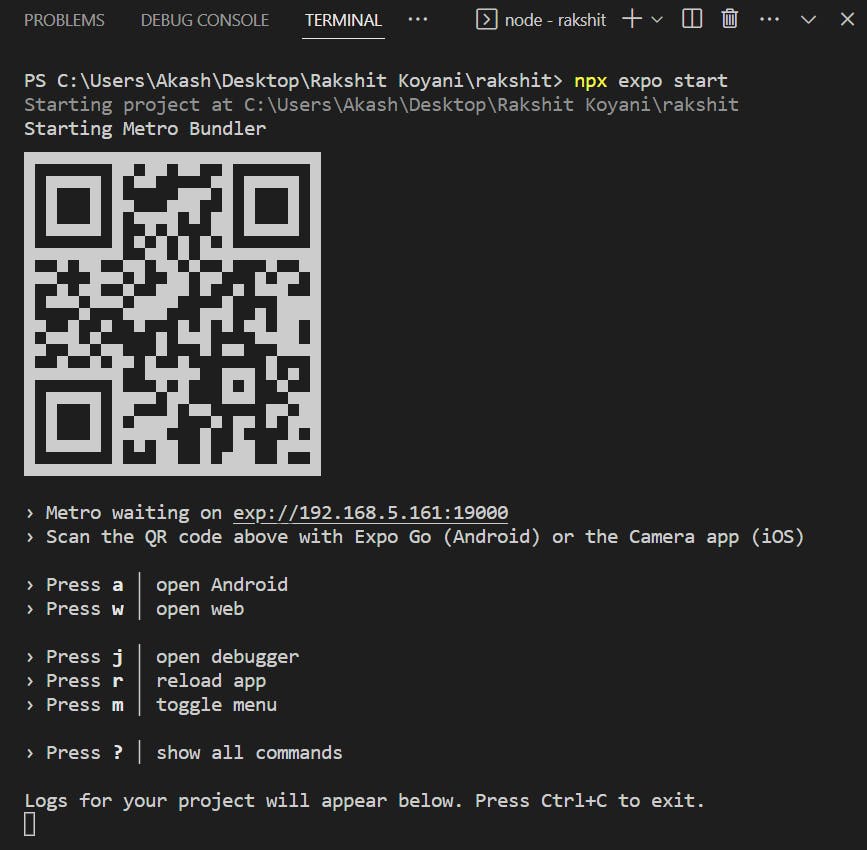
Later download the expo go from the app store or play store. open it and scan the above QR code and your ready to get started.
Folder Structure
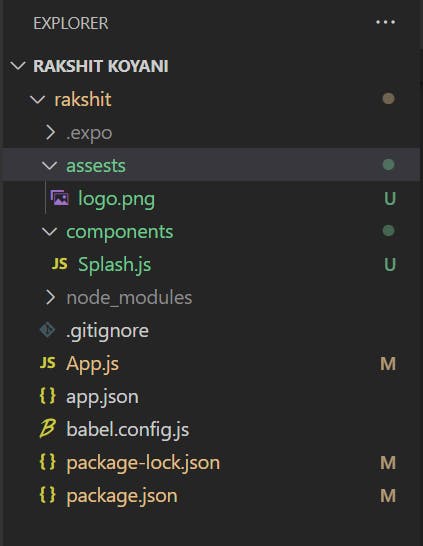
So I have created two folders:-
Assests ------> logo.png
Components ----> Splash.js or Splash.jsx or Splash.ts
Let's install React Navigation for routing
React Navigation is a powerful routing and navigation library for React Native apps. It allows you to navigate between different screens, stack them on top of each other, and customize the navigation experience to suit your needs. Installing React Navigation is a breeze - To install React Navigation in a React Native app using Expo Go, follow these simple steps:
1) Open your project in Expo Go and open the terminal.
2) Install the required dependencies by running the following command:
expo install react-navigation react-native-gesture-handler react-native-reanimated react-native-screens
3) Once the installation is complete, import the required components in your App.js
import { createStackNavigator } from 'react-navigation-stack';
import { createAppContainer } from 'react-navigation';
4) Defince a native stack navigator just above the App function
const Stack = createNativeStackNavigator();
5) Define the screens now. Add the options={{ headerShown: false }} parameter if you don't want the title it shows.
export default function App() {
  return (
    <NavigationContainer>
    <Stack.Navigator initialRouteName='Splash'>
      <Stack.Screen name="Splash" options={{ headerShown: false }} component={Splash} />
      <Stack.Screen name="Home" options={{ headerShown: false }} component={Home} />
    </Stack.Navigator>
  </NavigationContainer>
  );
}
Inside Splash.js
BASIC LAYOUT CODE:-
import React, { useEffect, useRef } from 'react';
import { StyleSheet, View, Image } from 'react-native';

const Splash = ({ navigation  }) => {
  return (
    <View style={styles.container}>
      <Image style={styles.image} source={require('../images/logo.png')} />
    </View>
  );
};

const styles = StyleSheet.create({
  container: {
    alignItems: 'center',
    justifyContent: 'center',
  },
  image: {
    width: '100%',
    resizeMode: 'cover',
    height: "100%"
  }
});

export default Splash;
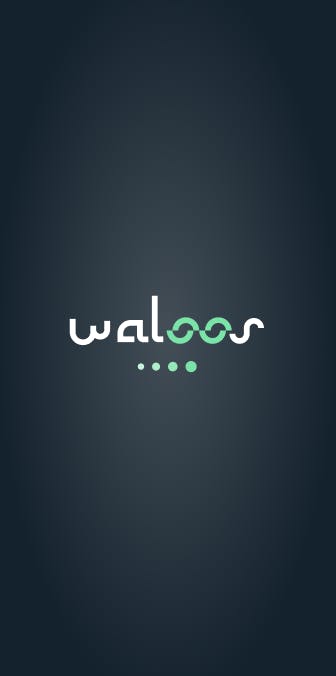
OUTPUT:-
Let's Navigate The Screen Now
Let's add a setTimeOut function in the useEffect and navigate the screen to the home page using stack navigator. Let's
import React, { useEffect, useRef } from 'react';
import { ImageBackground, StyleSheet, View, Animated } from 'react-native';

const Splash = ({ navigation  }) => {
  useEffect(() => {
    setTimeout(() => {
      navigation.navigate('Home');
    }, 3000);
  }, []);

  return (
    <ImageBackground
    source={require("../images/bg.png")}
    style={styles.background}
  >
    <View style={styles.container}>
      <Image style={styles.image} source={require('../images/logo.png')}/>
    </View>
    </ImageBackground>
  );
};

const styles = StyleSheet.create({
  container: {
    alignItems: 'center',
    justifyContent: 'center',
  },
  image: {
    width: '100%',
    resizeMode: 'cover',
    height: "100%"
  },
  background: {
    flex: 1,
    resizeMode: "cover",
    justifyContent: "center",
  }
});

export default Splash;
Let's Add Some Spinning Animation
Let's utilize the useRef hook to store the Animated Value. Later in the useEffect hook let's add a forever loop and add a duration of 1.5s for one spin and let's start the animation. Let's render it in the return statement and voila our animated splash screen is finished.
import React, { useEffect, useRef } from 'react';
import { ImageBackground, StyleSheet, View, Animated } from 'react-native';

const Splash = ({ navigation  }) => {
  const spinValue = useRef(new Animated.Value(0)).current;

  useEffect(() => {
    Animated.loop(
      Animated.timing(spinValue, {
        toValue: 1,
        duration: 1500,
        useNativeDriver: true,
      })
    ).start();

    setTimeout(() => {
      navigation.navigate('Register');
    }, 3000);
  }, [spinValue]);

  const spin = spinValue.interpolate({
    inputRange: [0, 1],
    outputRange: ['0deg', '360deg'],
  });

  return (
    <ImageBackground
    source={require("../images/bg.png")}
    style={styles.background}
  >
    <View style={styles.container}>
      <Animated.Image source={require('../images/logo.png')} style={{ transform: [{ rotate: spin }] }}/>
    </View>
    </ImageBackground>
  );
};

const styles = StyleSheet.create({
  container: {
    alignItems: 'center',
    justifyContent: 'center',
  },
  image: {
    width: '100%',
    resizeMode: 'cover',
    height: "100%"
  },
  background: {
    flex: 1,
    resizeMode: "cover",
    justifyContent: "center",
  }
});

export default Splash;
Final Code In App.js
Note: You also need to create a home.js file which exports a function so that we can register the screen and also navigate after 3s from the splash screen.
import { StatusBar } from 'expo-status-bar';
import React from 'react';
import { StyleSheet, Text, View, SafeAreaView} from 'react-native';
import { NavigationContainer } from '@react-navigation/native';
import { createNativeStackNavigator } from '@react-navigation/native-stack';

import Splash from './components/Splash';
import Home from "./components/Home"

const Stack = createNativeStackNavigator();

export default function App() {
  return (
    <NavigationContainer>
    <Stack.Navigator initialRouteName='Splash'>
      <Stack.Screen name="Splash" options={{ headerShown: false }} component={Splash} />
      <Stack.Screen name="Home" options={{ headerShown: false }} component={Home} />
    </Stack.Navigator>
  </NavigationContainer>
  );
}

const styles = StyleSheet.create({
  container: {
    flex: 1,
    backgroundColor: '#fff',
    alignItems: 'center',
    justifyContent: 'center',
  },
});
Final Code In Splash.js
import React, { useEffect, useRef } from 'react';
import { ImageBackground, StyleSheet, View, Animated } from 'react-native';

const Splash = ({ navigation  }) => {
  const spinValue = useRef(new Animated.Value(0)).current;

  useEffect(() => {
    Animated.loop(
      Animated.timing(spinValue, {
        toValue: 1,
        duration: 1500,
        useNativeDriver: true,
      })
    ).start();

    setTimeout(() => {
      navigation.navigate('Register');
    }, 3000);
  }, [spinValue]);

  const spin = spinValue.interpolate({
    inputRange: [0, 1],
    outputRange: ['0deg', '360deg'],
  });

  return (
    <ImageBackground
    source={require("../images/bg.png")}
    style={styles.background}
  >
    <View style={styles.container}>
      <Animated.Image source={require('../images/logo.png')} style={{ transform: [{ rotate: spin }] }}/>
    </View>
    </ImageBackground>
  );
};

const styles = StyleSheet.create({
  container: {
    alignItems: 'center',
    justifyContent: 'center',
  },
  image: {
    width: '100%',
    resizeMode: 'cover',
    height: "100%"
  },
  background: {
    flex: 1,
    resizeMode: "cover",
    justifyContent: "center",
  }
});

export default Splash;